Posted in Rou Bus

Rou Bus: Day 142- Moving right along

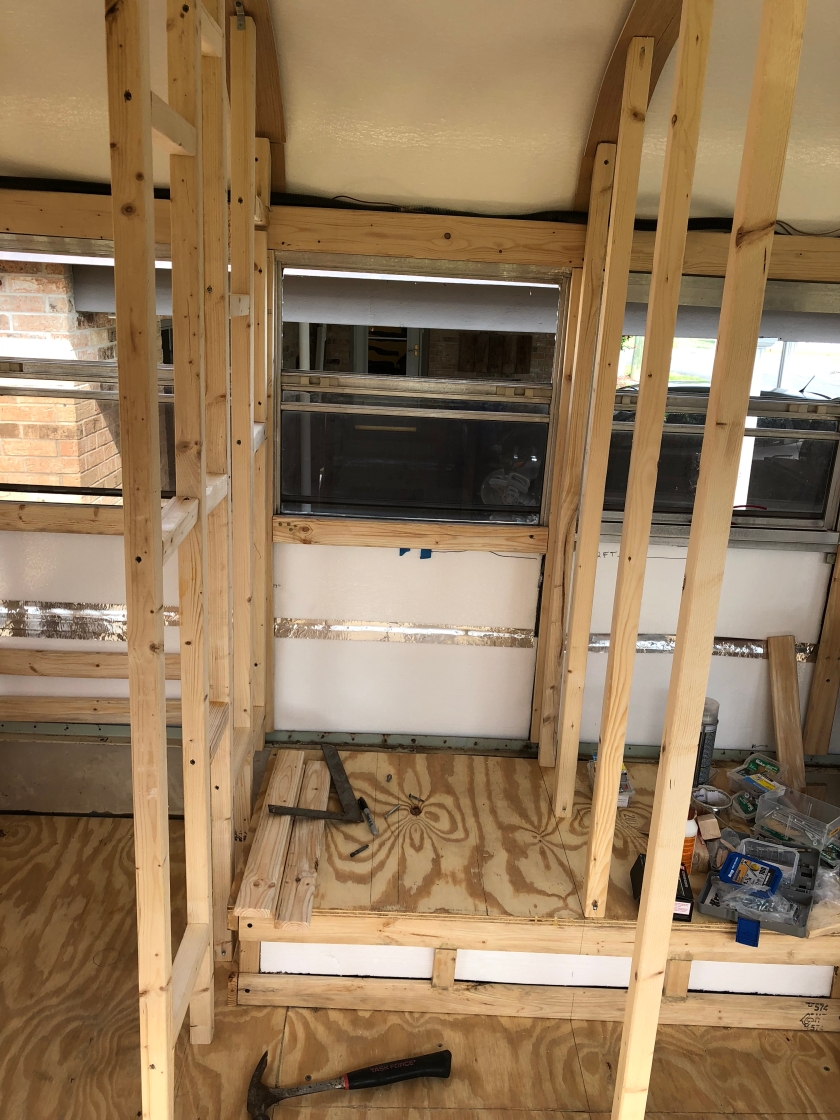
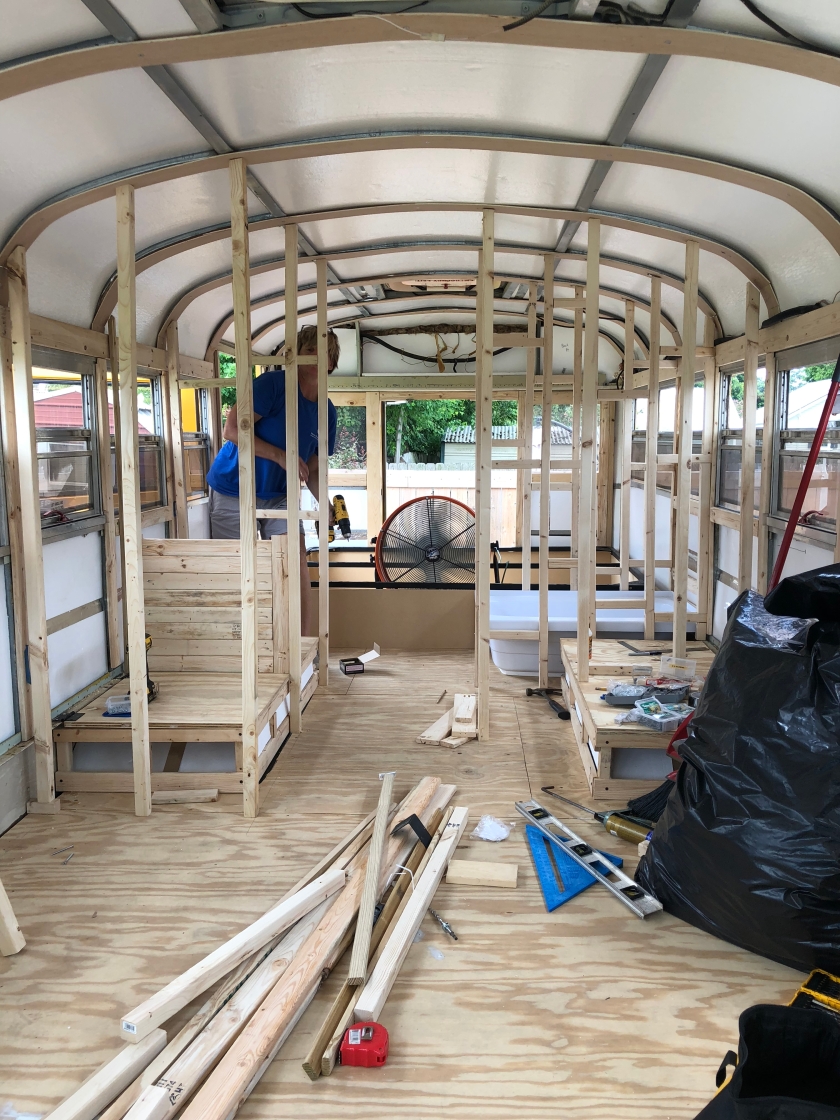
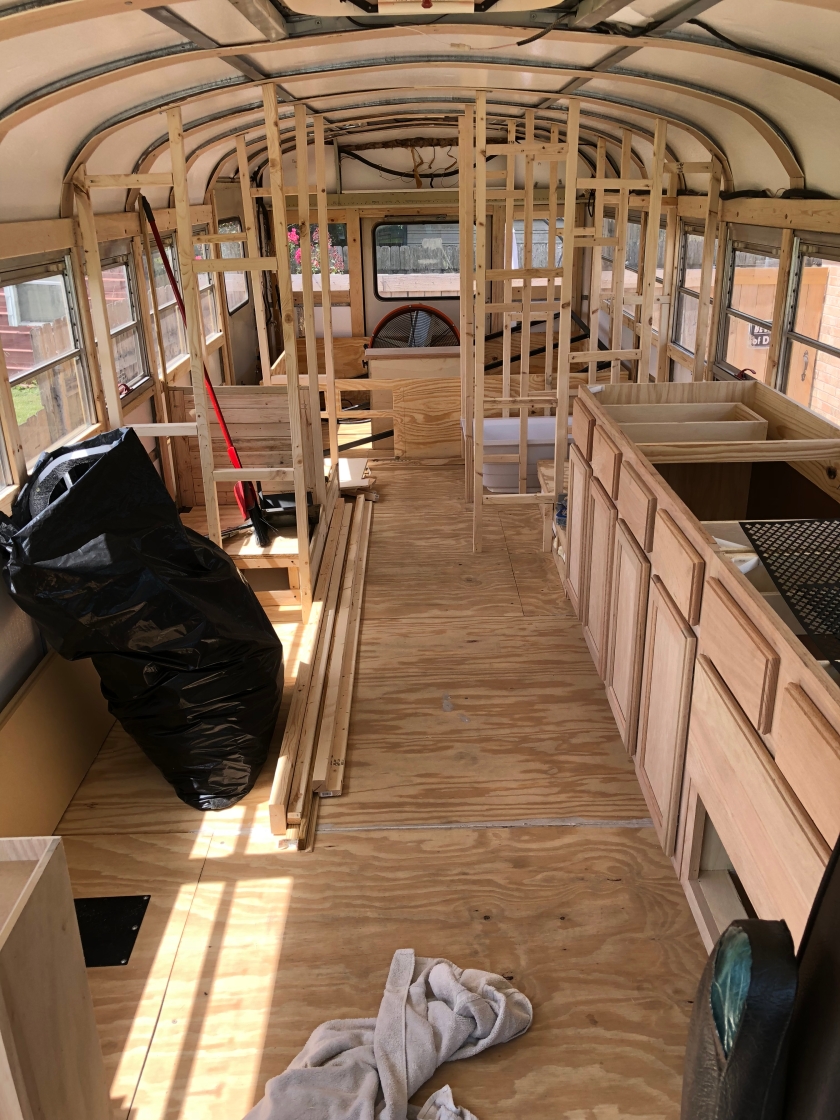
It doesn’t feel like much was accomplished in the last three weeks because the framing and cabinets going in felt so huge. Looking back at my pictures, we really did get many small things done.

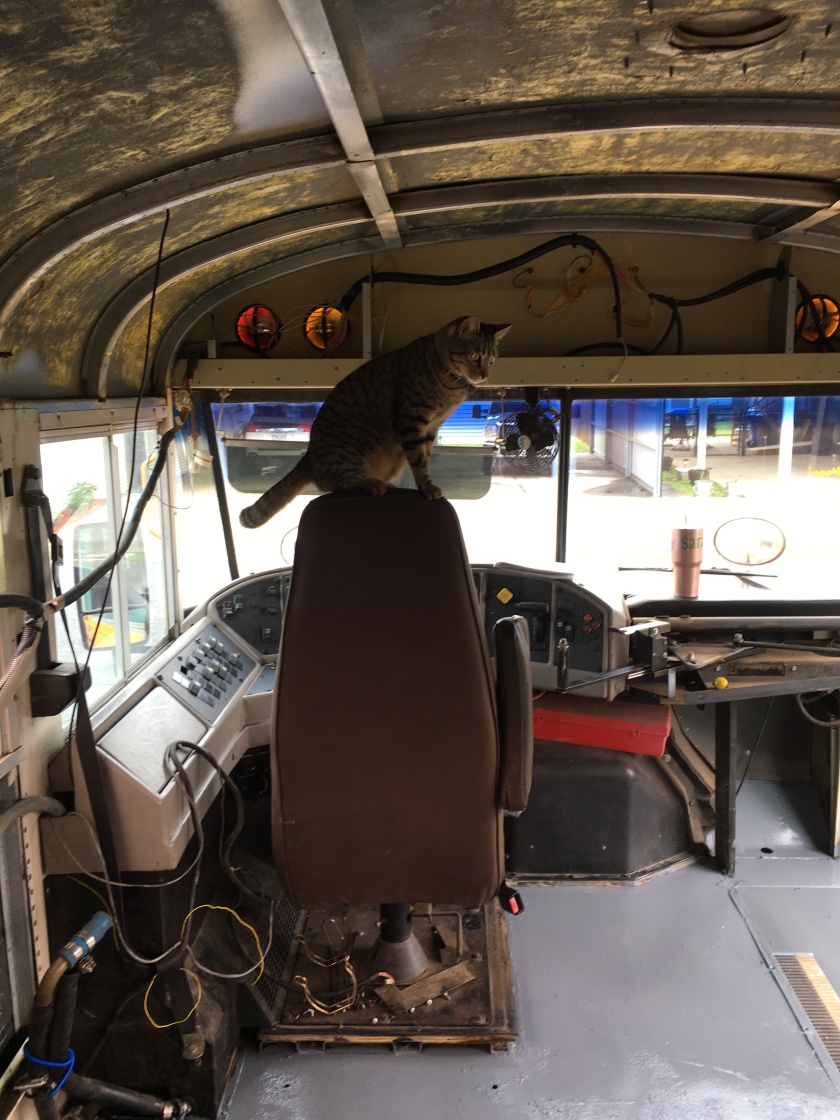
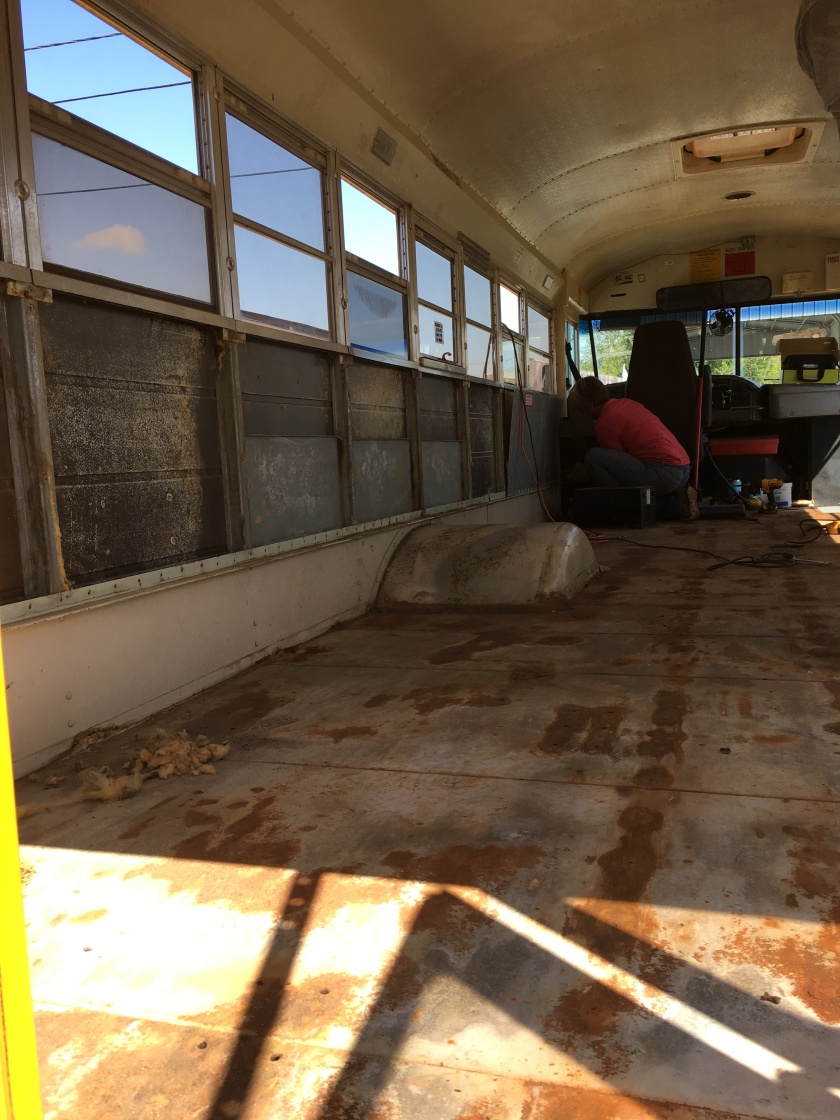
First up, we learned how to drive the bus!! I posted some videos on IG and FB. I can’t post them on here since I’m not paying for a premium website yet. My nannie drives a school bus and so nicely imparted her wisdom to us. First, she drove us to the place where we were able to get a commercial inspection tag. That’s when we realized that the drawers were not secured (duh…) and the heater hoses were exposed and still had fluid in them. The fluid leaked all over the plywood and the bottom of the cabinets, but it all dried up just fine. Luckily, our cabinets are real wood instead of particle board. We went to the Nicholls campus and practiced turns and backing up. I drove us home and backed into the driveway with the extra two pairs of eyes helping me out. Our carport and fence are still standing, so it went well.

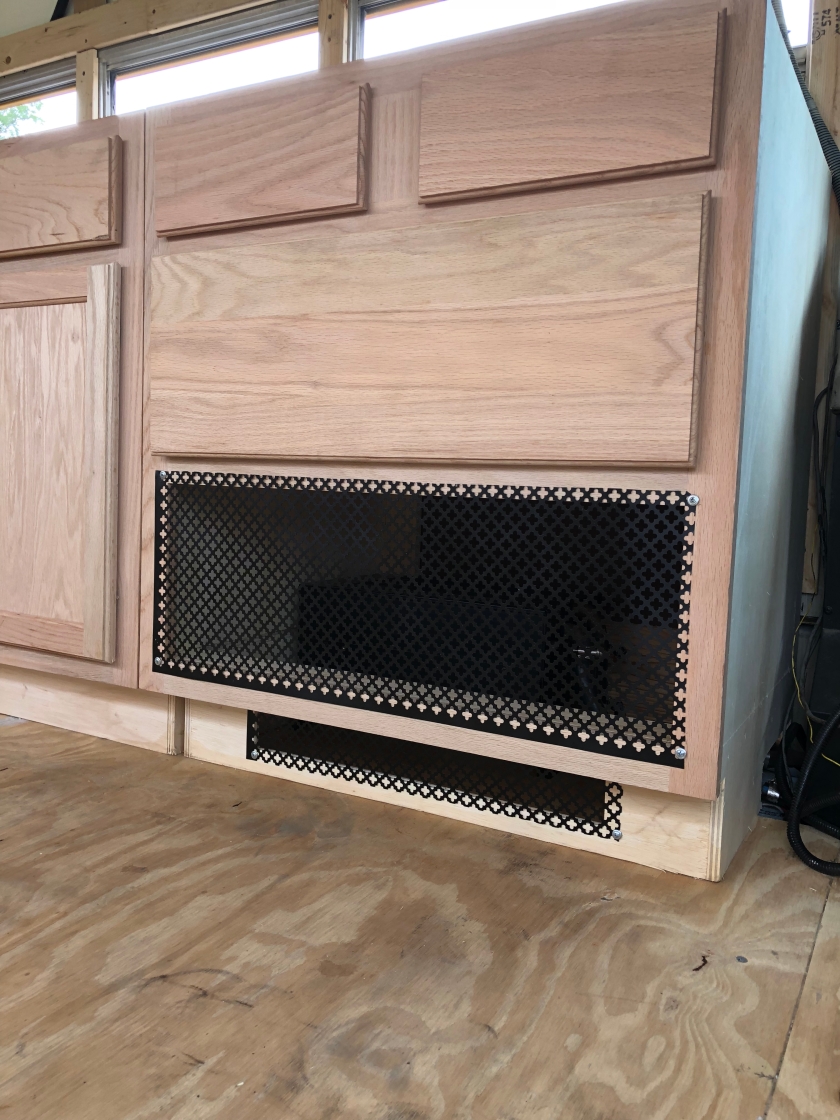
This is the screen we painted black and installed in place of a bottom drawer where the heater lives. I think it looks nice. See, no signs of a leak! Wendy did end up mounting the screens on the inside so it looks more finished.

IMG_1618

We’ve been picking up these wall panels whenever we have a Lowes coupon since we know we’re going to need them eventually. Wendy’s been itching to put some up so she started installing them where we know we won’t have to run electricity or plumbing. They look SO AWESOME! They are very thin and lightweight (super important) and they are reversible. One side is flat and the other has a beadboard look. We chose the flat side. They’re very pretty as is, but we’ll be painting everything white.

Wendy has made some more progress on the dash board storage area. We’ll have one shelf, a small glove box type cabinet, and one larger cabinet. The two doors for the larger cabinet are being repurposed from a microwave cabinet that Wendy’s dad built. Wendy turned the cabinet into a bar a while back and the doors were leftover. Now part of Wendy’s dad’s work will be in the bus! Again, our skilled friend, Jason, is routing them for us to match the other doors.

IMG_1819

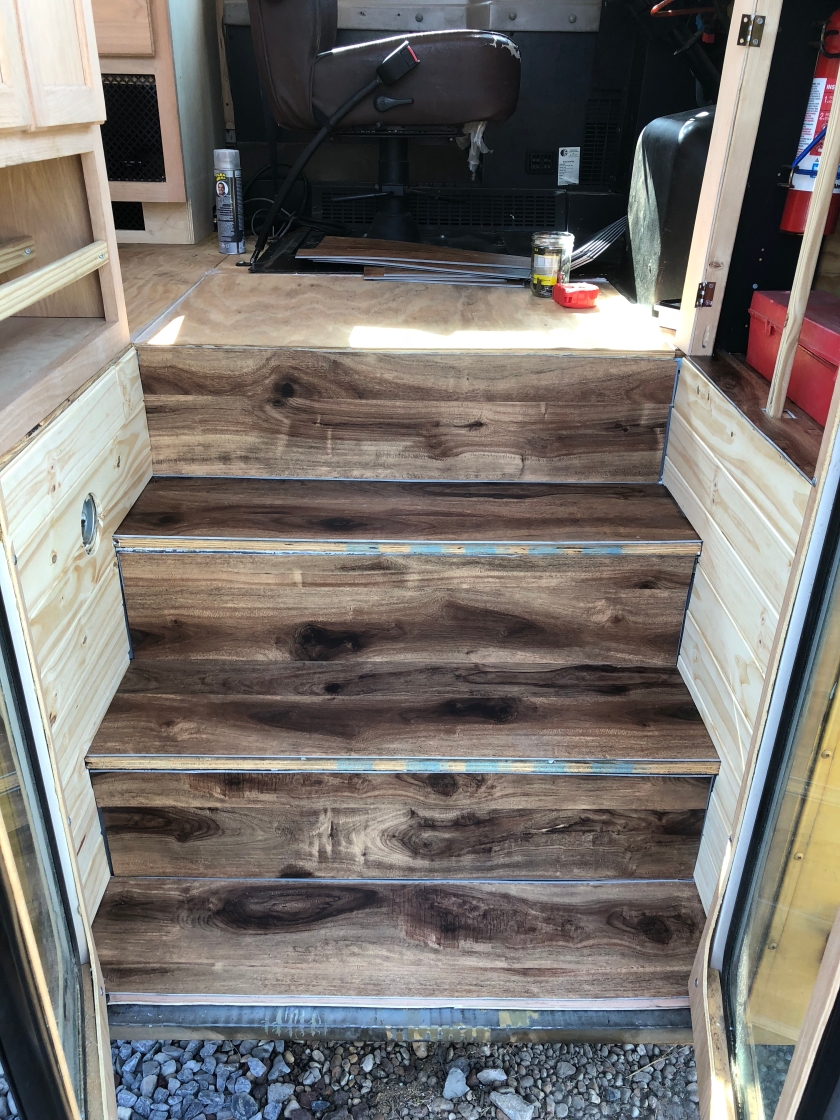
The entry way got a nice face lift! Wendy put flooring down on the steps and put panels on the walls. I’m really loving the flooring.

IMG_1661

On one of our thousands of Lowes trips, I picked up some samples of white paint. I wanted whites that didn’t have any undertones besides maybe gray. There are tons of options to choose from so I started with a google search for the best white paints. I picked up a few of the recommendations plus other whites that looked similar. I started by painting on a strip of wood to see the colors side by side. Turns out, three of the whites were nearly indistinguishable from one another. My favorite two were Ultra White and Cool Gray (these are all Valspar, btw). The gray was noticeably grayish when next to the other whites, but alone it just looks white. I figured a white with a gray tone would maybe not look quite as BRIGHTWHITE! as the Ultra White. Cool Gray it is.

In the bus, the cool gray just looks like white, and I love it. It was recommended that we spray the cabinets because it’s easier and leaves a smoother finish. For me, the hassle of prepping the space and figuring out a sprayer was more of a headache than just painting the cabinets with a foam roller. The finish is smooth and it wasn’t at all difficult.

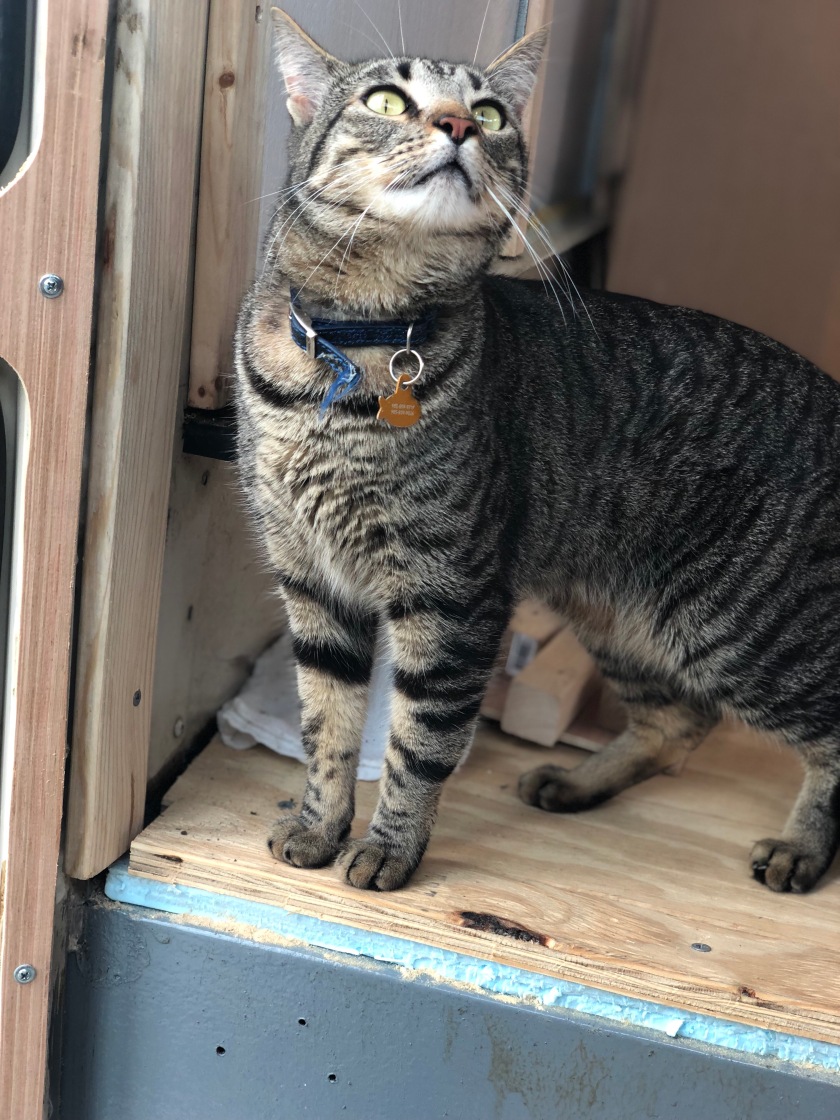
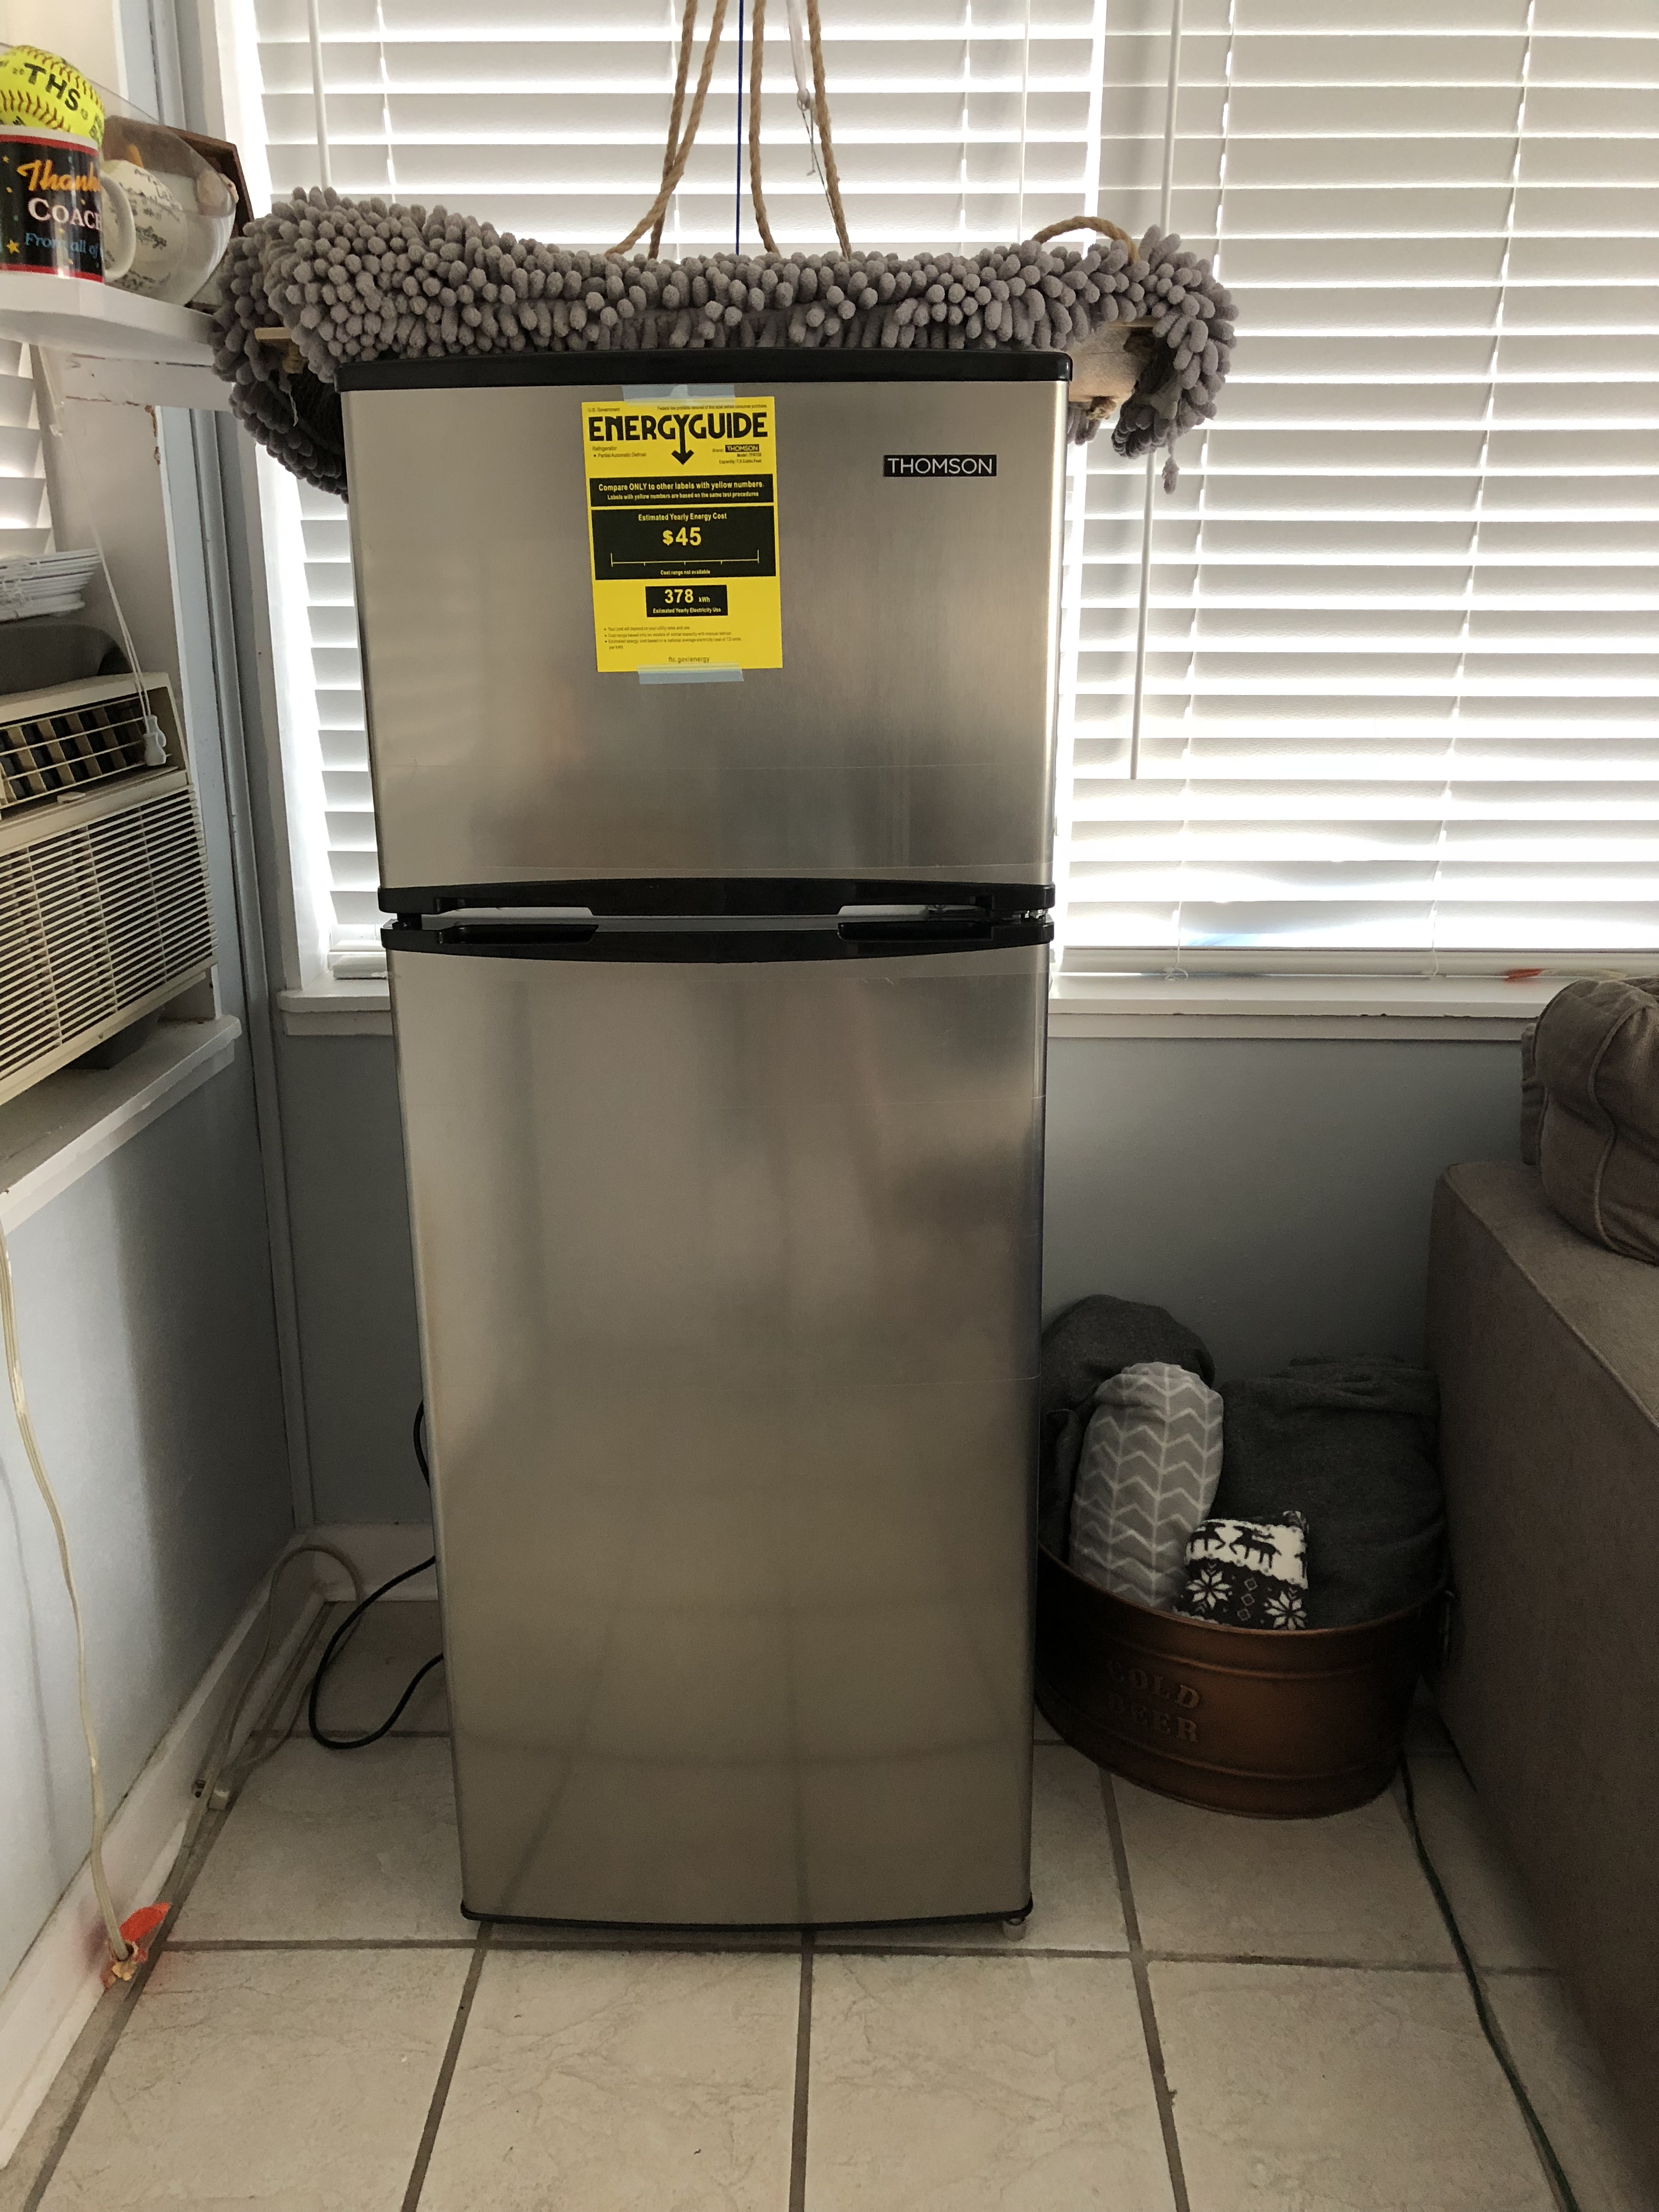
My nannie and grandma mentioned a small refrigerator they saw at Sam’s for $200. We looked it up online and it met our specifications so we immediately went to Sam’s to purchase it (there were only two left). It’s a standard apartment-size refrigerator that is not built to live in an RV, so says the paper. We’re not good at following directions. I’m assuming that it’s not meant for an RV because typically RV refrigerators have a gas power option and are built into the cabinetry. Our set up will be wired just like a house and the fridge will have plenty of room to breathe. I think it’ll be fine. For now it’s running in our back room to make sure it works. The cat swing makes for nice decor atop the fridge, no?

IMG_1654.JPG

We purchased an electrical panel, wiring, outlets, plugs, and storage boxes to prep for installing electricity. We are relying on the help of my uncle to install the storage boxes under the bus. They will house the electrical plug, extra wire for when plugging into shore power, and plumbing stuff. You know, that technical term for plumbing things… The hose that connects to shore water? I think that’s it. Now you all know my knowledge of technical terms is still non-existent.

Next up, Wendy will continue working on some small projects inside, I’ll help paint, and the storage boxes will be installed. Volleyball season is starting up so Wendy won’t have as much free time. I imagine it will be slow going for a while, but then again, we’ve gotten so much further than I anticipated when we started.

Oh! These are the paint colors I’m considering for the exterior. Gray on the bottom, blue/green under the windows, and white on top.

IMG_1646


Posted in Rou Bus

Rou Bus- Day 121: Framing and Cabinets and Rebuilding, Oh My!

I can’t believe so much was accomplished in just a week! And I actually helped, in the heat, this time and there’s photographic evidence. What.

I don’t recall sharing the specific type of flooring we decided on. We got these vinyl planks from Surplus Warehouse and as I link to it I’m seeing that it has a cheaper price online… not cool. We were debating between a gray wood and a warm wood look. Eventually warm wood won because our counter tops are going to be stained and sealed wood and I think this flooring will match them nicely. As much as I love a gray and white look, the bus space is so small that I don’t want it to end up looking too cold.

IMG_1426

On to the progress! Wendy put up the framing for the toilet room and the closet. I learned how to drill pocket holes with the kreg and now consider myself a master of the pocket holes. I can’t even tell you how many I’ve drilled.

This is the tiny toilet room! We’re going to put a small shelf or cabinet above the window to hold the essentials. We’re getting a composting toilet, probably the Nature’s Head.

IMG_1404

The closet is a nice size- 4.5 feet wide, 2 feet deep, and ceiling height. The bottom left quarter of the closet will be completely closed off to house the litter box. Instead of using a tape measure, we just lugged the whole litter box out to the bus to make sure it would fit. Quite proud of myself for putting up those wall slats! Don’t they look fabulous?! And all those expertly-drilled pocket holes. If school psychology doesn’t work out I may have a future in construction. hahahahahaaaaa  I also put the wood slats on the bottom front of the closet. We’re looking at these accordion doors for the front of the closet. The right side will have a full door and the left side will have the door just above the litter box area. The litter box will have it’s own wooden door with a cat door in it.

Looking pretty awesome so far!

IMG_1408

We had planned to build the sofa next until Wendy realized that we wouldn’t be able to get the kitchen cabinets in the bus with a whole sofa already in there. We decided to move the refrigerator to the other side of the kitchen (next to the toilet room) so that we could have a taller fridge. There’s a heater behind the driver’s seat that the fridge would have had to sit on top of. It’s easier to put a cabinet of some sort on the heater. We figured how many inches we had to work with (5 feet plus 30 inches where the heater is) and set out to price unfinished cabinets at Surplus Warehouse and Home Depot. Surplus Warehouse had the exact measurements we needed and a bonus cabinet that we can use next to the sofa and the stairs. Our original plan was for Wendy to build a cabinet next to the sofa until we found a perfect one. Home Depot didn’t have quite the selection that Surplus Warehouse had, so we trekked back to Schriever and bought some cabinets!

I’m going to have a full 90 inches of kitchen counters in the bus including the sink. The sink will be under-mounted and a piece of wood to match the counters will be fitted on top so the sink can also function as counter space. This is more counter space than our house, y’all. I’m so pumped.

Wendy had to cut part of the cabinet to allow the hoses to reach the heater. The bottom drawer was removed and we’re going to put a decorative screen in its place to allow the air to circulate. Since the heater blows out air almost on the ground level, Wendy cut a hole in the kick plate and will put a screen down there as well. We had some leftover screen from the bar Wendy built in our house. It got a nice coat of black spray paint and will also be used to cover a small vent hole in the ceiling. You can see it sitting on top of the cabinets in that first picture above.

The cute little cabinet that will fit between the sofa and the stairs got a little upgrade. It’s actually an upper cabinet that just so happened to be the perfect size and layout for what I imagined. I put two little pieces of wood in the bottom opening to turn it into a shoe rack. We should be able to fit two pairs of sneakers and several pairs of flip flops in there. I’d like to put a little piece of vinyl flooring on the bottom to keep it clean. I just love that it worked out perfectly!

Wendy finally came around to the idea that the bed needs to be higher to allow for more storage under the bed. The fresh water tanks that we’ve been looking at are usually taller than 12 inches. We pulled out the current framing, picked up some better plywood (not about that mdf), and worked on building a 20 inch high bed frame. I had originally wanted a couple of drawers under the bed and now we have an extra drawer from the kitchen, so we made that happen. Our amazing friend, Jason, who helped Wendy get the cabinets from the truck and into the bus, is going to try to help us rout some plywood to create two smaller drawers to match the big one. So now we have a bigger bed frame with openings for three drawers. Still waiting on the lift kit for the bed, btw.

Also pictured above: proof that I helped and even used power tools! I may have said, “This is too vibratey” after using that saw for ten seconds. My body is very sensitive to pressure.

When we first started looking for a bus, we wanted to get the maximum amount of space within the 30 feet we allowed ourselves for a bus (because of parking space). We were considering a flat-nose bus, but those come with their own downfalls such as engine placement and difficulty to service. When we settled on a dog-nose bus and I had to drop my layout sketches down by ten feet, I was really worried that our bus would be so cramped and tiny. I have been amazed at how much we are able to squeeze into our 19ft by 7.5ft of living space. We have a queen size actual bed (not a fold out sofa or other type of convertible bed), a 24″ by 38″ bathtub, a toilet room, a 4.5ft closet, a 6ft sofa that will pull out into a second bed, a 12″ cabinet next to the sofa, a 7ish cu ft refrigerator, and 90 inches of kitchen counters/cabinets. I don’t feel like we’ve had to settle for anything less than what we really wanted. Honestly, I feel like we’re getting more than I expected!

Next up, we’re going to put up some of the wall paneling in places that we know won’t have wiring or plumbing and will start on building that sofa. We ran into one of Wendy’s friends who offered to help us with electrical who knows what he’s doing and is an avid camper. We’ve been so lucky with the help we are receiving and we are beyond grateful!

IMG_1528


Posted in Rou Bus

Rou Bus- Day 115: It’s starting to look like a camper!

Wendy has made so much progress in the last couple of weeks. Throwing up framing really brings it all to life. It’s so exciting!

After putting in the sub floor and insulation, she insulated and boxed in the wheel wells. When reading the instructions on the box of vinyl flooring, we realized framing on top of the floors was not recommended. We shoved the boxes of flooring under the spare bed in the house for safe keeping. 🙂

Wendy then put framing on the walls and furring strips on the ceiling. Instead of buying furring strips, she cut strips from a piece of thin plywood.

Pro tip: write down measurements on literally any surface. I have no idea what these mean and I’m not sure Wendy remembers what they mean either. 🙂

In the front of the bus, Wendy put up a piece of wood under the spot above the windshield. It looks much nicer than just the black metal. Eventually we’ll make the whole space into cabinets and mount a small television (also to be used as a back up camera) and probably a stereo with speakers. The space under the dash by the door will also be a cabinet. Storage everywhere we can squeeze it!

Now for the really fun part- framing! In order to make sure the framing measurements were correct, we went ahead and purchased the metal bed frame with lift kit and bathtub. The metal bed frame arrived without the lift kit and we’re still trying to rectify that situation. Wendy was able to use the instructions on the bed frame website to build the wood frame for under-bed storage.

IMG_1384.JPG

Since the bathtub is going to be next to the bed, Wendy framed up the bathtub walls next. We changed up the floor plan a bit to give us more space. We were going to put the bathtub in and just leave a small opening by the toilet to get in and out of the tub. The opening was tiny- maybe 8-10 inches. Not going to happen! We decided to put the bathtub by itself and then enclose the toilet in it’s own tiny room with an accordion-style door. This works out well and actually gives us a bit more room. We had also initially planned to just have a shower pan in the 24″ by 38″ space. I was searching the internet for a shower pan and came across tiny RV bathtubs with those exact dimensions! It’s not quite big enough to really relax in, but it will make bathing dogs on the road so much easier. And it’s super cute.

It’s looking like a camper now!! Across from the tub and toilet room is the closet and litter box storage. Wendy framed up one of the closet walls so I was able to walk through and really get a feel for how much walking space we have. I am surprised and relieved that the whole back area feels quite spacious. There’s a little space behind the closet across from the tub that we can easily get dressed in. I’m planning to hang some curtains to block off the tub area and/or the whole toilet/tub/closet area for privacy from the front of the bus. The curtains can also keep the cool air-conditioned air in the bedroom at night since the mini split will be mounted on the back wall above the bed.

IMG_1379

Next up will be framing the closet and the toilet room and building the sofa. We’re still anxious about plumbing and electrical. We’ve consulted with many friends and our heads are still swimming a bit. Once we get past electrical and plumbing we’ll feel much better.

Neil hasn’t jumped the fence to the front yard in a very long time, but decided to come check out our progress the other day! I think he’s going to enjoy traveling.

IMG_1382

Posted in Rou Bus

Rou Bus- Day 98: Insulation and subfloor

I was reading through the last post to see where we left off and I had pictures of Catsy laying under the bus. Not too long after that post, our beautiful Catsy girl was killed by a car. Our sweet girl loved to explore. It was traumatic and heartbreaking and we miss her dearly. She would have loved traveling in the bus. RIP Catsy Cline

We last left off with a few leaks and some locks on the doors. Just when we had thought all the leaks were gone, more would pop up. There’s still one lingering leak at the bottom of the side door, but it’s being managed. I don’t know exactly what Wendy did, but I know she caulked and sprayed and sealed so much that we may not have to even paint the bus. hehe

Once the leaks were truly under control, Wendy started measuring out insulation and 3/4″ plywood for the subfloor. The insulation is the hard blue foam kind that is sturdier to hold up under flooring. We were able to walk on it without crushing it. I think we only needed about 4 sheets of it. We used liquid nails to attach it to the floor and then to attach the plywood on top. Some sections of plywood were warped so Wendy ended up screwing those sections down.

Once the floor was down, we picked up some more insulation for the walls and ceiling. We chose the white 3/4″ foam sheets that have foil on one side and are not as sturdy as the blue sheets. Wendy measured out all the little pieces and I cut them and squeezed them into the wall and ceiling sections. The metal ribs of the bus have lips on them so the foam pieces were easily bent to pop into each section. We didn’t even bother using liquid nails since they stay in place on their own and will have wall and ceiling panels on top of them.

Wendy just finished cutting plywood to fit over the steps and is now at Lowes picking up materials to box in the wheel wells. We’ve decided to put in the vinyl plank flooring before framing out the bathroom and closet walls. It won’t be much longer until we start figuring out electrical. We have a very lovely friend who offered to help us out with that.

We’re still moving along slowly. It’s hard for me to be in the bus in this Louisiana summer heat. It’s a good thing Wendy is built tough!

Posted in Rou Bus

Rou Bus- Day 56: a quick update

Happy Cinco de Mayo!

It’s been quiet on the home front around here. I searched through my phone for pictures to post and I only had two. *gasp* I will run outside and take a few pics before I finish typing so this quick update doesn’t turn into a boring quick update.

All of the doors have locks on them now. These may or may not be the final locks when we hit the road, but they’ll work for now to keep our progress inside safer. We also plan on getting some outdoor cameras.


The major battle Wendy has been fighting (because, honestly, I took no part in this except to wield a water hose) has been against window and door leaks. Buses are not water-tight. Who knew? We knew, we just weren’t quite prepared for how difficult it would be to seal things up. Where are all the holes? We can’t even see them!

Wendy resealed all the windows and spots near the doors and sprayed the bus down with the hose. It still leaked. She sealed again- fewer leaks. I think she’s finally down to one leak.

IMG_5230
Wendy sealing the roof seams

Once we can keep the water out, the subfloor can go down and the walls can be framed. Then we’ll need to figure out electrical which is seriously overwhelming. If anyone has electrical experience or knows someone who does, hit me up! We need all of the consultation and help we can get. We’re still trying to figure out which power sources we should use for which appliances. We’d like to be able to use shore power AND go off grid for short periods of time. We’ve got to be complicated.

Catsy loves to lay under the bus. I can’t wait to take them on a trip and see them all freak out. 🙂


And just because Wendy can never have enough projects, she created a new patio area in the back yard and built a sofa out of cinder blocks and 4x4s and a table out of pallet wood. Handy, that wife.

IMG_5537

Posted in Rou Bus

Rou Bus – Day 28: Done with subtraction

Last week we finished up the demo. Daniel the diesel mechanic came by and helped Wendy remove the heater and the last of the ceiling and wall panels. The heater will be re-installed later, but for now it was just in the way.

Since we plan on turning the bus doors into one typically-functioning door, Wendy removed the plastic covering the door-opening mechanism (killing it with the technical terms still…). We found empty soda cans. How? Why?

Not gonna lie- I didn’t actually do anything on the bus this time. I cooked instead. Once everything was out, the floor needed to be treated for rust spots. Wendy bought some Corroseal and Rustoleum online. The first step was to roll on the Corroseal (two coats). The Corroseal turned the rust black. Then she filled in the holes from the seats with silicone and pieces of mesh. The Rustoleum came next and made the floor look pretty nice!

During the week, we were able to finally get insurance! Once I was able to show them it was titled as a motor home and that the seats were removed, we were quickly given a policy. It ended up being even cheaper than the initial quote. Score! With insurance in hand, we were able to get a license plate!!

IMG_5172

With the floors ready to go, the next step is to frame up the floors, walls, and ceiling and fill in with insulation. In order to know where we need to have studs in the floors for the walls, we put down tape to check our layout. This gave us a more realistic feel for how much room we will (or won’t!) have. It prompted a good discussion about the bathroom and what we truly need. We ended up nixing the tiny bathroom sink altogether to have more kitchen space. We would really only use that sink to brush our teeth or wash our hands, which we can do in the shower or the kitchen sink. I’ll be sure to have some fancy hand sanitizer in there.

The second picture below is the preliminary floor plan. The toilet section will move closer to the shower to give us another two feet or so of kitchen space. We’re also planning for storage space under the bed and under the sofa. The sofa will also convert into a small bed.

I guess this is where King Neil thinks he’s going to be riding…

IMG_5218

It’ll probably be quiet for a while. We’ll definitely be able to get some studs and insulation in, but we have to do a lot more planning for electrical and plumbing. We also need to find someone to help us with the electrical. I have a feeling that’s going to be a big job!

Posted in Rou Bus

Rou Bus – Day 15: Grind day and night

I totally forgot to play Beyonce today. Shame on me!

Wendy got started around 8:00 this morning (I’m typing this Sunday night, but probably won’t publish until Monday- must proofread with a clear head). Today’s number one goal was to remove the walls under the windows. The walls are folded somehow under the windows so we would have to remove all of the windows to properly remove the walls. Not happening, friends. Most people just cut the walls right under the windows and call it a day. That’s more our speed. Wendy bought a fancy new tool to cut the walls. First, she used it to remove the last of the pesky bolts. Then, she removed the rubber and plywood from the floors.


I actually helped today! I used the drill to pull up some of the screws from the floor. I swept. I removed the stickers from around the emergency exit window until the sun was too much for me. Wendy started to sand the rust off the floor, causing me to suffocate under the mask. No worries; I’m still alive.

Wendy is always going to be the real MVP in this project. Always.

My dad helped us tremendously today! Turns out Wendy’s fancy new tool wasn’t quite fancy enough to cut through the walls. Dad’s super fancy tool worked, though. I think it was a more powerful grinder. Maybe by the end of this conversion I’ll know actual names for tools. Maybe I’ll remember to play Beyonce, too. Goals.

IMG_5102

Check out that rust! It’s not horrible and it was expected. I’m not sure if buses, being giant metal boxes, naturally retain enough humidity inside to cause the rust, if water from the road seeps in through the bolts, or if drivers hose out the inside of the bus allowing water to seep under the rubber flooring.

Our friends Lanie and Alyssa stopped by during their Sunday bike ride! Hey, y’all!

IMG_5101

After the walls came out and Dad left, we took a lunch break. My grandma stopped by for a visit and brought us daiquiris. 🙂 Then back to work we went removing a million more screws. I felt super cool using the impact drill to remove the screws. We were able to take down the panels above the windows and remove the lights. They were just nicely plugged into the wires. That’s our kind of electrical work. We removed all the screws from the panel above the back door and about two rows of screws from the ceiling panels. That was about the time we both had to tap out. I’m deliriously tired.

I think we’ve accomplished quite a bit for only four days of work. I don’t think Wendy has any softball games next weekend so I’m sure we’ll get quite a bit done! Next up, we have to remove the ceiling panels and the panels above the windshield. We also have to treat the rust on the floor then figure out what we want to use for insulation.

Posted in Rou Bus

Rou Bus- Day 8: Demo all the things!

We’ve only had the bus for a week but it feels like so much longer. I’m pretty sure all of our conversations have been bus related. I still haven’t taken down the Mardi Gras decorations in the house. I’m still giddy every time I turn the corner and see the bus shining in all its yellow glory. Bus is life.

Last Sunday after we finished up removing the seats, we were working on the wheelchair lift. Those bolts have a dome-shaped top that you can’t grip. We found ourselves in the tool section at Walmart, likely looking dumbfounded trying to decide which tool we needed. A young guy walked down the aisle and asked if we needed help. We told him our dilemma and he pointed out a vice grip and mentioned that he’s a diesel mechanic. A WHAT?! We NEED a diesel mechanic! Oh yea, he works for International. You know what kind of bus we have? An International! Thank you, universe. And Oprah. (You know it was Oprah.) I immediately added him on Facebook.

Thanks to the world of Facebook marketplace, all of the seats and partitions were picked up on Tuesday by a very nice man from Bayou Blue. On Thursday, another very nice man impressively removed the wheelchair lift by himself and gave me some useful bus tips since he owns party buses.

Since Wendy is in the height of coaching softball, she can really only get work done on Sundays. So, today, our diesel mechanic, Daniel, came by to help remove the air conditioner. Remember that cloud of smoke driving home? Let’s not have that again. Buh-bye AC. Also remember that I’m not the muscles behind this operation so I cooked breakfast and lunch and went to the grocery store and used the razor blade to remove some of the stickers on the outside. So many stickers. A tedious and thankless task, but someone has to do it, right? 😉

After Daniel departed, we continued to work in the bus removing screws and flooring and again attempting to remove those pesky bolts with the dome-shaped tops. We eventually gave up and called my dad to borrow the grinder. Next week, we grind! Watch me play Beyonce while we work.

Next up will be more demo. All of the rubber flooring and nasty plywood, the walls and insulation, the ceiling. Basically anything that’s screwed down is coming off.

IMG_5022

Posted in Rou Bus

The Rou Bus! Day 1.

We bought a school bus!!

IMG_4928

All my peeps know that I’ve been obsessed interested in tiny houses for four or five years now. I abandoned the tiny house dream when Wendy and I decided to get married since she already had a house. We expected that we would buy a camper one day, so of course I started a Pinterest search for campers and came across some folks who renovated old campers and made them look super cute. I’m sure this is where I ran into pictures of old school buses converted into campers. I quickly concluded that a “skoolie” (as these conversions are called) would be perfect for us. We wouldn’t have to worry about buying a bigger truck with towing capabilities, the bus shell is built tough to keep kids safe, we could plan a layout that works best for us and 6 animals, and the inside looks just like a tiny house!

I don’t remember exactly, but I don’t think it took long for Wendy to get on board. She loves a project. We created a Rou Bus Pinterest Board to save ideas. We joined numerous Skoolie groups on Facebook. We researched (googled…) as much as we could about conversions. Now, we’ve been known to have many outlandish dreams that never come to fruition. With the skoolie dream, we knew we wanted to act now and not let this dream die. We set a budget (tax return…) and started looking online for used buses. We initially wanted a flat nose bus because you get more living space, but the rear engine buses don’t come in size medium. Hehe. We have limited space to park the bus, so 30 feet was our target size. We eventually decided on a conventional (dog nose) bus with 8 windows (the skoolie community usually measures buses by the number of windows on one side) and a handicap lift in the back (for an extra exit door). We moved our fence back and added more limestone to maximize parking space. I tried to spread the limestone with a shovel (I’m still sore) before Uncle Curt came to the rescue with a tractor. ♥

I spent a good two weeks trying to get the bus insured so we could immediately register it and be good to go for the drive home. That didn’t happen. Companies don’t want to insure a regular school bus for personal use because they don’t trust that you’ll do what you say you’ll do. Understandable. We read about many other people withholding information to get insurance, but that seems like a waste of money to me since any claims would likely be denied. We decided that we’ll just hope for the best on the drive home and get insurance once it’s converted. There are companies who will insure conversions, but they have to be somewhat completed first. Spoiler alert: we did make it home safely. 🙂

We looked at three school buses during our search and purchased the third one from the very sweet Wyatt Cambre, JR of www.cambrebus.com. We found his ad on Craigslist and set up an appointment immediately. We cannot recommend him enough! He was extremely helpful and answered all my text message questions. If you’re in or near South Louisiana and need a bus, go to his website and give him a call.

We took off to Covington to get ourselves a bus! My Nannie drives school buses and agreed to drive it home for us. ♥ I have the best aunts and uncles! It didn’t take us too long to get the paperwork completed at the title place and they registered the bus as a motor home, which should help when we try again to get insurance. Before we knew it, we were on the road home! Nannie and Wendy in the bus and me in the Fit following behind. We had just gotten onto the interstate when I saw some smoke under the bus. Before I could even think to call them, they were pulling over to the side. They said smoke was going into the bus through the dash board! EEK! I called Wyatt and he offered some suggestions. We decided to get back on the road and stop at the next exit, but after getting back on the road the smoke never returned so we kept on trucking. Wyatt checked back in on us twice, because he’s super nice like that. Later on we figured it may have been the broken AC compressor that I forgot to tell them about and they had turned on. Oops. My bad, y’all.

We got home a little after 2:00 and by 3:00 we were inside the bus working on taking out the seats. Waste no time, folks. So much for that nap… Wendy got to work on the first bolt when I told her that from what I read, one person needs to be under the bus holding the nut in place while the person in the bus turns the screw. Forgive my elementary terms here; I’m not a tools person. Y’all know my fibromyalgia self wasn’t about to lay down on limestone, so I threw Wendy under the bus (hahhahahahaa) and used my little muscles to use a socket wrench (I think) to loosen the screws. After a couple seats we found it was easier to loosen the screws with the wrench and then finish off with the drill. THEN my dad stopped by with big carpet squares for Wendy to sit/lay on and a super powerful drill (the name escapes me) that made all of this much easier. By 7:30, all of the bolts were out of the floor. There were 9 seats, 4 partitions, and about 12-14 wheelchair anchors.

Day 1 is done. Day 2 is underway. We have a TON of work ahead of us, but we’re ready for it. We expect this project to take at least a year. Rou Rags (I make shirts, y’all!) will be helping to fund this adventure.

I’ll update as often as I can and if you’re in town, please stop by!